Walls and Floors
The illustrations in the dollhouse instructions are quite helpful, often more so than the written instructions. This is typical for dollhouse assembly guides. Pay close attention to the illustrations as you work to ensure each step is done correctly.
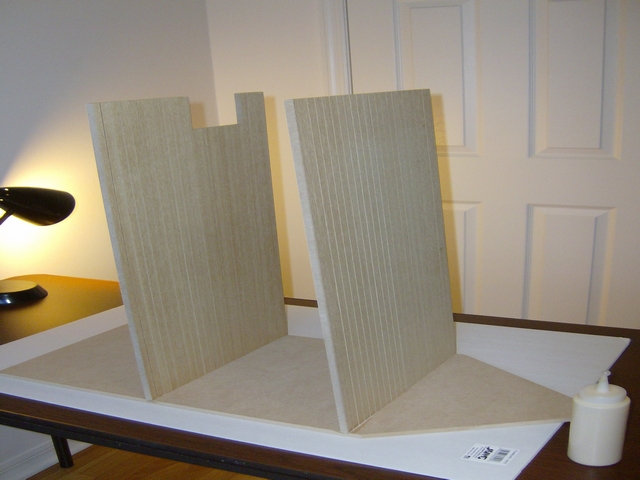
Start by attaching the side walls and the middle and upper floors. This is straightforward because the parts are sturdy and thick enough to stand on their own, preventing them from falling over while you glue them in place. Once the side walls and floors are assembled, carefully turn the structure right side up and secure it with masking tape. The thick parts and grooves in the side walls help keep everything stable during this process.
After the structure is upright, insert the bottom floor between the side walls, aligning it with the grooves, and glue it in place. Use masking tape to clamp it securely. Before the glue dries but after it becomes tacky enough to handle, install the front wall. It’s a good idea to temporarily place the room partitions to help straighten the middle floor, making it easier to attach the front wall. Ensure that the front wall is flush with the side walls, bottom floor, and top floor, then clamp tightly with masking tape.
Glue
These parts are heavy, so I recommend using wood glue for assembling the shell. Keep in mind that wood glue does not dry clear, so be careful not to let it get on the scored hardwood floors. Wipe away any excess glue and apply it close to the wall edges to hide it under baseboards.
Nails
Do not assemble this dollhouse without using the recommended nails. If you only use glue, the structure may come apart. Nails should only be used to attach the side and front walls to the middle and top floors. Use a hard surface when driving in nails for easier insertion.
For the side walls, place a nail at each end and one in the middle. Be cautious around the staircase opening. For the front wall, place a nail at each end and two evenly spaced in the middle. Don’t worry about exact spacing; they will be hidden later. Make sure not to miss the floors with your nails, as this could cause nails to poke through interior walls or damage floors. Use the clapboard siding lines as a guide and drive nails straight. If a nail goes in crookedly, stop, remove it, and use a new hole nearby. To make nail heads invisible, use a nail setter or a Phillips head screwdriver if you don’t have one.
Spackling Compound
Use spackle to fill small holes. Allow it to dry thoroughly—preferably overnight—then smooth it with your fingernail against the wall. Avoid sanding since it's difficult in small areas and can damage pre-milled siding. Your fingernail works well for these small spots and helps define any pre-milled siding lines.
Gap Fill
I have not yet installed the "gap fill" piece that covers the groove along the staircase opening. It’s best to wait until after wallpapering for a cleaner finish.