Today, I assembled the doors for the dollhouse, which features a double entry door and a side door, all made from laminated pieces. I chose to do this now so they can dry completely before installation. In dye-cut dollhouses, it requires some pressure to insert the doors into their openings. Therefore, it's important to let the doors dry for at least overnight to prevent them from pulling apart under pressure. Additionally, sanding them down is necessary to ensure a proper fit. Binder clips are very useful for building dollhouses.
The staircase assembly for this dollhouse is straightforward, consisting of a simple straight staircase. This design allows you to position the staircase either facing the back or the front wall of the dollhouse. Since I plan to add a matching runner to the carpet, I will position it facing the back so it will be visible. Before assembling the staircase, dry fit the sides under the stairwell to ensure correct placement. It's essential to be certain of its orientation before starting assembly.
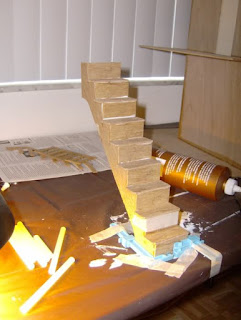
The best way to assemble a staircase is to keep it upright. I do this by clamping it at the bottom where the first riser goes and using masking tape to secure the clamps to the table. This keeps the staircase standing as it would when installed in the dollhouse. Clamping at the first riser is crucial for maintaining stability as you work your way up with the steps and risers. If you plan to paint your risers and stain your steps, do this before installation. I intend to stain the entire staircase and then add the matching runner. The steps have a slight overhanging lip on the left side, so ensure that the right side is flush with the staircase sides; otherwise, it won't lay flat against the wall.
While waiting for the staircase to dry, I wallpapered the last room. I placed a template over the carpet while working in this room to protect it from paint and glue. Remember, there’s still much work to be done on this dollhouse, so it’s important not to stain your carpet before finishing assembly.


