I stained the staircase and first floor using a gel stain medium from Delta Ceram Coat, which allows acrylic paint to function as a stain. This is ideal for covering the large floor area of the dollhouse, as traditional stains can be quite smelly. The gel stain is convenient for use in non-ventilated spaces, but you can also use gloss acrylic varnish.
After everything dried, I installed the second floor. The process went smoothly, given the floor's large and awkward shape. Once that was in place, I added the kitchen bay wall. While waiting for everything to dry, I assembled the stairwell separately. This stairwell must be fully completed before installation, as it will be inaccessible afterward.
I primed the kitchen bay wall and realized that I could now install the bathroom/bedroom partition since it wouldn’t interfere with anything else. I then applied wallpaper to the kitchen bay wall and primed the stairwell.
Next, I prepared the third floor by painting the ceiling white and drawing wood planks on the floor. I stained the second floor and primed the bedroom wall, which needs wallpaper before installing the stairwell because it will not be accessible afterward. I wallpapered the entire stairwell with the same wallpaper planned for the bedroom. Even though this area won't be easily seen once the dollhouse is built, it's important to finish it since it will be visible through the windows. Once everything was dry, I glued the stairwell in place.
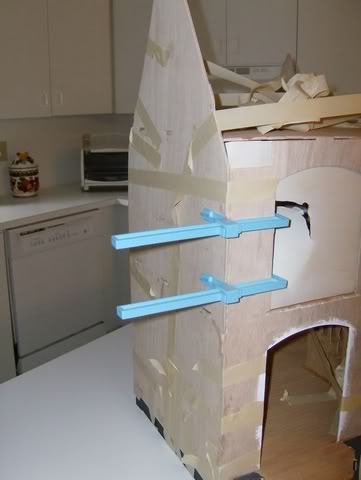
The remaining work can wait until after installing the third floor. Installing the third floor was challenging due to limited space for clamps and difficulty keeping masking tape in place. The wall's peaks edges can easily cut through tape, so using several layers may help. Be sure to dry fit everything first to ensure proper alignment of tabs that hold it together. Keep a hammer handy for stubborn tabs.
While waiting for that to dry, I returned to the first floor to install windows. The oval windows will become inaccessible if delayed. I painted around the window openings and then painted the windows themselves. After drying, I sanded and painted around them again before installing the windows and kitchen door trim.
Finally, it was time to put up the back wall. This step proved extremely difficult, likely due to final alignment issues within the dollhouse structure. Use any available tools to clamp; when one side is secured, another may pop out. Continue clamping until everything is held in place securely.