Now that the staircases and the shell are completely dry, I primed all the shell walls and painted the ceilings. I usually turn my dollhouse on its side for better access, but be careful. The raw wood walls look similar, making it easy to confuse a ceiling or wall with a floor. If you plan to stain your floors, do not prime them, as this will ruin the finish. Double-check what you're painting before you start. I also stained the staircases with a light-colored stain.
Once everything was dry, I planned the partitions to figure out my wallpaper. I can't install the staircases until that’s done. I dry-fitted the two partitions for the first floor, which separate the kitchen from the foyer. The staircase is in the foyer, facing the kitchen. To insert these partitions, start by gluing in 'Partition #1', which has an archway. You may need to tap it in straight with a mallet to fit it into the slots. Clamp it until dry. This is why it's important not to follow instructions that suggest applying all windows and doors before assembly; doing so would prevent you from wallpapering and accessing areas for clamping.
After the glue dried, I primed 'Partition #1' and measured my wallpaper for it. Before wallpapering, decide whether you will stain or paint your window casings. If painting, you can wallpaper as usual. If staining, dry-fit a casing in the window opening and mark around it with a pencil. Cut your wallpaper around this mark before applying it so you can stain that area later. Remember, you can paint over wallpaper but cannot stain over it.
I wallpapered the front wall first and then dry-fitted the staircase to determine where the foyer ends and the kitchen begins. I wanted different wallpaper for each space, so I cut my wallpaper to stop at the foyer behind the staircase and then wallpapered 'Partition #1' on that side.
Next, I installed the staircase, which was easier than I expected. It fit perfectly except for one slot on the floor; there was a tab that wouldn’t reach it, so I cut it off. The key is for the staircase to sit flat on the floor; if anything obstructs it, just cut it away. I now have an open slot on the floor that I will cover with wood filler later. Other than that, everything went smoothly with the installation. I will apply trim to the bottom of the staircase later when I install baseboards. Do not add any trim now because it could interfere with partitions or other components; it's best to leave this step for last.
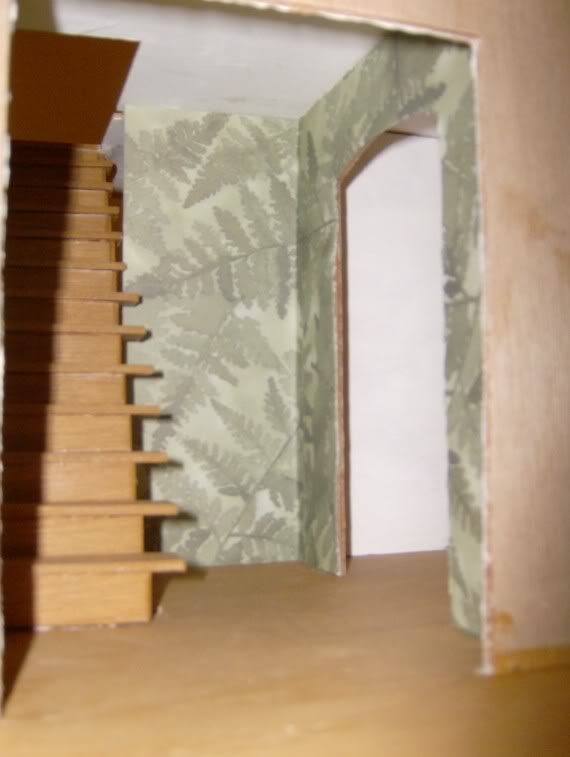
After the staircase dried, I installed 'Partition #2'. This was challenging due to limited space and having both a staircase and 'Partition #1' in the way. Take your time and don’t rush; use a hammer to tap the partition gradually until all tabs are in place. Be prepared for scuffs on your floors and ceiling—and possibly on your staircase too—since you'll need to touch them up later. This is why the top five treads of the staircase are shorter; without this adjustment, fitting in 'Partition #2' would be impossible. If you've squared everything properly and glued tightly, you should have no issues.
Once 'Partition #2' was installed and dried, I wallpapered its foyer side using access from the front door opening. Avoid installing the front door too soon; you'll need access for trim and window work later. Even if this area will be mostly hidden from view, finish it like the rest of your dollhouse since people can see through the double front doors. Since I was already there and finished with that area, I decided to wallpaper the kitchen as well. Crease your wallpaper around the staircase for a perfect fit.
Finally, I tackled the last partition, which was easy since there are no tabs or slots involved. Just make sure to wallpaper its foyer side before fitting it into place. Once primed and wallpapered on that side, simply butt it against the staircase, glue it down, clamp it until dry, and then you can wallpaper it to match the kitchen.