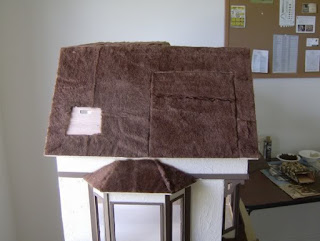
I applied acrylic varnish to all the thatch. You can choose either a matte or gloss finish; it doesn’t matter since the fur won’t reflect any shine from the varnish. Use whatever you have on hand. Initially, the varnish makes the fur look terrible. When wet, it appears grayish or white, which is unappealing. However, once it dries, it turns clear and gives the fur a nice thatched appearance.
Some fur lays flat on the roof, while other types have natural wrinkles and waves. Even the same piece of fur can have different textures depending on what’s available at the fabric store. Sometimes you find beautiful fur, and other times it can be more challenging to work with. When thatching a dollhouse roof, expect some panels to look very flat while others have more texture. This variation is simply how some faux furs are made. You can comb out the fur, but it won’t change the final look. The differences come from how the fur was attached at the textile mill and the quality of the fibers. Just like real thatched roofs, there will be natural inconsistencies.
After varnishing, if you have any fur overhanging the roof edges, you can trim it flush with small, sharp scissors or leave it as is, depending on your preference. I chose to cut mine flush.
I attached the chimney and let it dry overnight, using masking tape for extra support since it's quite heavy due to the pebbles. I painted all the roof eave edges brown. Initially, I thought about leaving them in the dollhouse color, but after adding the thatch, I felt they clashed too much. Painting them brown created a much smoother transition along the roof edges. I ran out of varnish for the top flat roof but plan to get more today.


