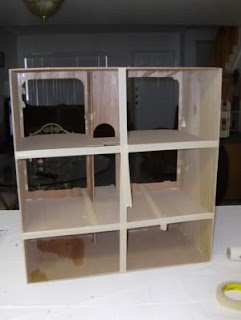
The instructions suggest starting with the interior trim on your windows and doors, but doing so will make it difficult to wallpaper your dollhouse properly. It's better to leave all trim until after assembly and finishing. Wallpapering the walls while the dollhouse is disassembled can be confusing and may create seams at the joints. You should only wallpaper before assembly if there are areas that will be hard to reach later, such as in certain bay windows, dormers, or attics. For now, focus on assembling the shell first.
Begin by gathering all the parts needed for the shell of the dollhouse. It's important to build the entire shell at once so that the glue stays wet and the parts remain flexible, which aids in assembly. Take your time; wood or tacky glue requires 24 hours to dry completely, and the parts will remain flexible until then. It's easiest to build the dollhouse while it is lying on its back. Constructing it upright will be challenging because the walls tend to fall over. Clamp each joint tightly as you work, ensuring that no parts are left unclamped. When you add the floors later, they will put pressure on the walls, which could cause them to pull apart so it's important to use plenty of glue for a strong shell.
Once you have assembled the Base, Front Wall, and Side Walls, pause to ensure everything is clamped tightly and all joints are secure. The structure will be quite flimsy at this stage, so handle it carefully when turning it upright.
The next step according to the instructions is to install the Hallway Walls, but you should skip this step. Installing them now will make it difficult to add the floors later. Instead, focus on putting in the First and Second Floors first, then stop there. Do not install the Third Floor yet. Make sure everything is clamped securely. If glue seeps onto your floors and you plan to use them, wipe it off with a wet sponge or towel before it dries; you can also sand it off later if needed.
Now that you have installed the First and Second Floors, you can add the Hallway Walls. Position them in the slots for the First Floor through the opening of the Second Floor, and gently tap them down with a rubber mallet until they fit into place at the Base Floor slots. Then secure the small tabs of the Second Floor into their slots and clamp everything.
Finally, install the Third Floor. Ensure that everything is tight and straight; even if the structure feels wobbly, it must remain aligned. Lay it on its side and place weights on top to keep the joints between the floors and side walls tightly together while they dry.


