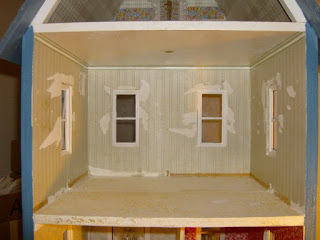
I have now moved on to the second floor of the dollhouse. I already removed the carpet, baseboards, and electrical outlets. This floor will be done a bit differently. I plan to add a partition to create a bathroom, similar to the first floor, but this one will extend all the way to the back edge. The bathroom entrance cannot be an open walkway, so I need to create a faux door. This is a straightforward process, as I have done it with my other dollhouses before. Because of the door, I need to apply the templates differently than on the first floor.
First, I will install all the wallpapered wall templates, then add the finished partition, and finally apply the ceiling and floor templates. This sequence is important because I need to finish the partition wall before installing it. I know where I want the partition, so I made templates for the walls just like I did on the first floor. I used copy paper for the templates and then transferred them to poster board. There is a gap in the front wall templates where the partition will go. I installed the wallpapered templates as I did before. I made the partition from foam core, just like on the first floor.
To create a template for the bathroom door, I creased copy paper around the front door. This ensures that the door will be the same width and height. I traced this template onto the partition with a pencil on both sides so that I can apply wallpaper around this area, creating the illusion of a door. You can apply wallpaper directly onto foam core without needing templates. However, keep in mind that foam core may warp slightly, causing some buckling in the wallpaper. Do not worry about this; once it dries completely, it will straighten out.
After the wallpaper dried, I added trim around the "door" and then installed the finished partition. There is a slight warp in it, but this will be hidden once everything is complete. I have not yet added ceiling paper or flooring to this floor; those steps must come after installing the partition.


