I wanted to install some components today and started by painting the exterior of the dollhouse. The body of the dollhouse requires two coats of paint. After applying the two coats, I sanded and assembled the windows, beginning with the small ones since they have the most parts. Each part of the window needs to be painted separately, including both the front and back. If you look inside the dollhouse or out the windows, you’ll notice any unpainted areas because they will show raw wood edges. It's important to paint all sides of each piece, even if they overlap, as small details matter in a small scale.
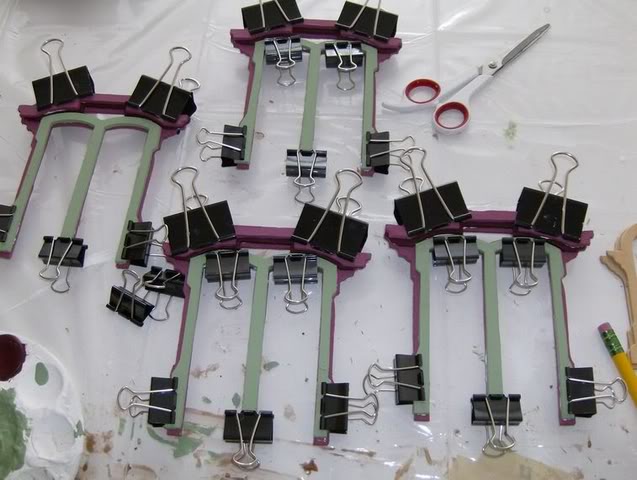
Once the windows were painted, I clamped them with binder clips and then attached them to their openings. Clamping requires a lot of force but ensures that the parts sit flat against the walls. While the windows dried, I worked on the roof and began assembling the chimney. The instructions suggest building this assembly away from the dollhouse, but I found it easier to do it directly on the dollhouse. I glued the chimney front in place first, which helped it fit better into the slots without fumbling with the side roof panel. I left this assembly unfinished for now because I want to give it a green stucco finish. This will match the green tones in the wallpaper for that room and will also cover any gaps. Initially, I considered wallpapering the chimney but changed my mind. Since I can't stucco with the assembly out of place, I need to leave it unfinished for now and stucco later. If you plan to paint or wallpaper these parts, it's best to do so before assembling them for easier application.
While that dried, I started assembling the barrel roof. I took some pictures to show where the support goes; it fits flat against the interior wall in the slots. The pieces for the barrel roof fit perfectly, indicating that the dollhouse is square and straight from the start. The true test for a straight build comes with the roof, which is quite complicated in this case. The barrel roof has ridges that allow it to bend. I applied masking tape on the back and gently bent each ridge panel until it formed an arch without breaking off. After gluing them in place, they fit perfectly with no gaps.
Next, I moved on to more windows, gluing on the bay sills and windows. I also attached all of the roof trims for both the porch and bays before returning to work on the main roof, where I glued all of the mansard roof supports and added the top roof cornice trim.