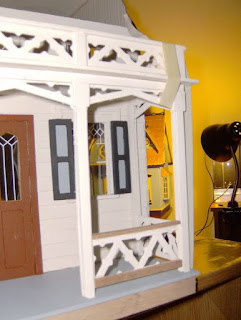
I assembled the bay balcony and the porch balcony easily. The post trims are supposed to be four narrow and four wide, but they all ended up being the same width. I measured them, so there's no need to guess which ones are narrow or wide. Once the paint dried on both assemblies, I glued them in place. I added the porch foundation to stabilize the porch floor for the trim, which was also simple.
Then I moved on to the porch itself, which is a bit confusing and tricky to assemble, so be sure to follow the instructions closely and refer to my pictures. The long pieces with squares on top go at the front, while the notched pieces fit in the back. Dry fit the side pieces to see how the notches work with them. I recommend building the front assembly first, as it will guide you in assembling the sides, which should all look uniform. If you're using different colors for painting, make sure to paint each piece before gluing them together. Since I used one color, I assembled everything first and then painted it.
The instructions suggest building the entire assembly away from the dollhouse, but I chose not to do that. Assembling it in place helps ensure a better fit since the porch is a tight squeeze. It's important to paint the assemblies before installation because reaching the back side is difficult once it's attached. Also, avoid painting the bottoms of the front assembly posts so they can slide easily into the porch floor squares; you'll need a mallet for this. Before clamping everything, dry fit your side assemblies to ensure everything aligns properly.
Once everything is straightened up, clamp it in place and start painting and assembling the sides. With the front completed, it’s easier to see how the sides fit together. After everything dries, spackle any gaps or rough edges and do touch-up painting. I also painted the porch foundation and installed the steps.


