The instructions for this dollhouse do not include any pictures, and the schematics are not labeled like those in other dollhouse kits. Therefore, you need to read the instructions carefully and label the schematic images yourself.
Once you assemble all three floors into the center partition, the walls can be raised quickly and easily. The dollhouse has a straightforward boxy design, so using a rubber mallet can help pieces fit together better. Since this dollhouse will remain unpainted wood, I cannot use wood glue on the exterior, as it would be visible. Instead, I must use tacky glue for everything on the outside. I can use wood glue for the interior joints but must be careful not to let any seep through to the outside, as wood glue does not dry clear.
It is important to ensure that all parts fit tightly together. Since the dollhouse will not be painted, there will be no way to fill any gaps later, so I need to work very carefully to avoid them.
Please pay close attention to this part - This dollhouse assembles using a locking method that differs from the usual tab-and-slot technique, although it does have those features as well. The slots and locks allow for minimal glue use because the locking mechanism keeps everything in place. This makes it an ideal model for an all-wood finish without paint. The walls are designed to hold themselves together with the window lock box pieces. However, you should still use glue throughout the assembly for added sturdiness. This process can only be done in one way, so make sure to learn it carefully.
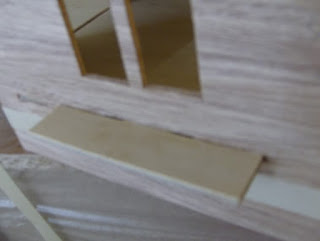
You cannot let the glue on the floors dry before attaching them to the walls; you must do this while everything is still wet and movable. Each window lock box has a slot under the window. You need to fit the smaller end of the lock box through this slot into the floor opening where it was before assembly. To do this, gently push down on the floor around the slot from inside with your finger. A little push will suffice; then fit the smaller end of the window lock box through the slot and rest it in the floor opening. Ensure it is flush all around. There is no need to glue the window lock box; once the glue around it on the floors and walls dries, it will be secure.
I did not number my window lock boxes as suggested in the instructions because I could identify their positions by the wood grain pattern. However, I recommend that you number and label yours to ensure a better fit when placing them back in their original openings. The window lock boxes serve as both the bottoms of your exterior window boxes and complete your interior floors. They are essential for assembling the dollhouse.
If you find that your glue has hardened and you haven’t installed your window lock boxes, don’t worry. You can simply cut each box in half, separating the interior from the exterior piece, and fit each part into its corresponding opening. I have included pictures of the window lock box at the bottom of this page.
Be sure to wipe up any glue drips, as they will dry hard and interfere with wallpaper or other components you may want to add later. Finally, check all your joints and then clamp them together. Apply wood glue to all interior joints around floors, ceilings, and wall seams, and allow it to dry.


