Today, I marked each sheet's number with a black marker for easier identification. Be careful not to accidentally mark any dollhouse parts.
I started assembling the base. Make sure to follow the pictures closely for proper lattice slat assembly. All lattice slats must run in the same direction as shown in the picture. Dry fit everything first to ensure accuracy. I used wood glue to put the entire base together and clamped it as I went along to keep it tight and square.
Once the base was assembled, I let it dry. This takes some time, so I began working on the floor. I'm finishing the original floor of the dollhouse, but instead of just staining it, I drew wood planks with a pencil for added detail. I maintained a standard measurement between each board, making sure my marks were dark enough to see after staining or varnishing. This is an economical way to finish flooring, especially for a large dollhouse.
After completing the floor, I glued it to the dry base. Glue as you go rather than all at once. I glued and clamped it all around, and everything fit perfectly.
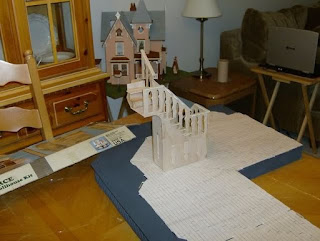
While the foundation dried, I started working on the staircase. Use wood glue, tacky glue, or a combination of both for the staircase; avoid hot glue because you need time to adjust the parts and ensure they are squared. Follow the pictures carefully to avoid assembling the staircase in the wrong direction. I assembled the bottom portion of the staircase and used tape as clamps where possible.
After allowing it to dry, I continued with the foundation. I painted the foundation, including the underside and edges. I also painted the porch floors. Later, I will paint the bottom of this foundation since it will be visible through the lattice and expose raw wood; it's important to hide this.
After painting the foundation, I continued with the staircase by assembling the upper level gluing on treads, and risers using tacky glue. Always dry fit everything first to avoid mistakes. Continue using wood glue and make adjustments as needed while things dry to ensure straightness and evenness. I dry fitted the staircase to check if everything fit properly; it did. Allow sufficient drying time.
For added detail, you can apply punch-outs from between the staircase rails to the staircase base. Glue them upside down on the staircase walls for an architectural element. Once stained, these pieces will enhance the design of the staircase instead of leaving it plain.


