This dollhouse features double-hung windows, and I've explained how to assemble them as best as I can. If you're still unsure, there's a detailed tutorial by Deb Roberts available here.
The instructions for this dollhouse are somewhat different. They lack detailed photos for each step, and while there are some illustrations on the final page showing certain assemblies, they aren't very useful. Although this small dollhouse isn't overly complicated to build, the instructions can be confusing for beginners.
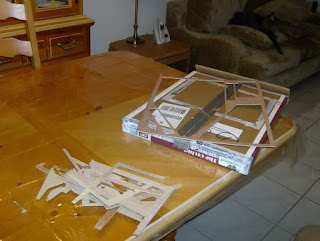
I managed to assemble the shell, but it was a bit challenging. You need to hold all five sheets in place at the same time; if you try to do them one at a time, they will keep falling. To ensure a tight fit, position them all together and secure them with masking tape. I used wood glue and plenty of masking tape to hold everything together. It's important that all the pieces fit tightly, as this ensures the glue will bond well. All the tabs and slots fit together without any issues.
While the dollhouse was drying, I removed all the pieces from the sheets and labeled them. Since this is a small dollhouse with few parts, it shouldn't be too confusing to do this. However, if you're unsure, it's best to leave the parts in their sheets until instructed to remove them. I bagged each part according to its use, such as putting all porch pieces in one bag and all window pieces in another. For larger parts like partition walls, I kept them labeled in a pile. As I removed parts from the sheets, I crossed them off on the schematics to ensure I had everything by the end.
Some sheets had significant delamination on one side. The ceiling of my first floor was too damaged for just painting, so I plan to cover it with a ceiling cover. You can use wood putty, sand it down, and smooth it out, or opt for miniature ceiling covers or textured wallpaper. I have cardstock on hand, which will work well too.
After removing and bagging the parts, I'm ready to prepare some components. I took off the masking tape clamps from the dollhouse shell since the glue has dried enough. There's not much else I can do with the shell right now because I need to order wallpaper; I can't progress further without it.
Tomorrow, I'll apply the first coat of exterior paint to the walls. I want to wait until then so that the wood glue has ample time to dry completely. If I paint while the glue is still wet, it could cause warping and pull the walls apart, so it's best to let it sit overnight. I like to add extra wood glue at the joints to fill any missed areas since the wood absorbs this extra glue into any gaps.
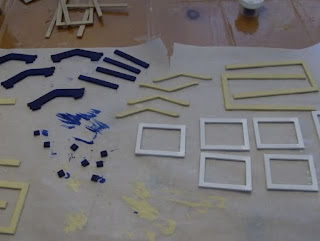
I've sanded all the window parts and started painting them. I'll sand each component as I work on it. I'm staining all the interior trim because I think it will look better with my idea for the floor. Be sure to paint all sides of each piece unless you're certain that all edges will lie flat against a wall.


