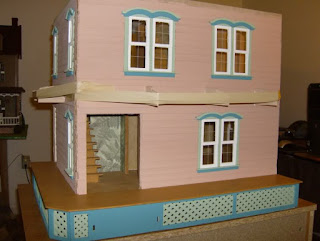
I wanted to work on the kitchen screen door next. I used the actual kitchen door from the dollhouse as a template and removed it from the sheet. When I placed my screen door over it, I noticed that my screen door was wider and shorter than the original, which was a good thing. If it had been narrower, it would have been more challenging to fit.
I centered the original dollhouse door over my screen door and marked around it with a pencil to create a cutting guideline. I then used a utility knife to trim the door down to size. These laser-cut screen doors are very fragile because they are made of delicate birch wood and have intricate designs. Sanding them could cause damage, and scissors or an Easy Cutter would be too rough. The best method is to lay the door flat on a sturdy surface and gently score along the guidelines with the utility knife, applying firm but gentle pressure so that the blade does the work. After cutting, I lightly sanded the edges to smooth them out. The best technique is to lay one edge on a flat surface and sand it, then turn it around and do the same for the other side.
Once the door fit perfectly in the opening, I painted it and set aside the screen mesh for now. It’s important to ensure that the door fits without pressure. Be cautious when painting, as moisture from the paint can soften the wood, making it more fragile. Allow it to dry completely, ideally overnight, before installation.
After installing the door, I used a thin stick to cover the gap at the bottom, which fit perfectly. There are various ways to conceal this gap; one option is to install the door normally and trim the interior and exterior trim to hide any gaps at the top. However, since I wanted to place the original dollhouse door inside in an open position, I couldn't do that without revealing that the opening was shorter than the open door.
Once everything was glued and dried, I attached the mesh screen to the interior of the door. After some touch-ups with spackle and paint, the door was complete.
While waiting for that to dry, I installed the porch roof supports. Although I should have painted them beforehand, they are easy to paint afterward. Just clamp them tightly against the wall until they dry.


