I painted the risers and steps of the staircases but used stucco for the rest. You can choose to paint or stain the entire staircase, but I prefer the stucco finish because it gives the impression that the staircase is part of the wall. The second-floor staircase lacks backing, so the stucco effectively conceals any gaps or imperfections at the back of the steps and risers.
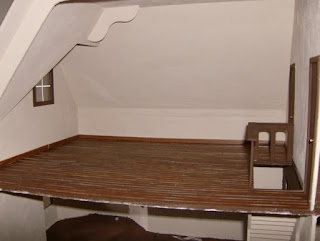
I installed the first-floor staircase over the flooring and the second-floor staircase before laying down the flooring. For the second floor, I cut the flooring around it. I chose this method because of the closet under the first-floor staircase. It would have been difficult to install flooring in that tight space after placing the staircase, and it would complicate fitting the hinged door. The second-floor staircase has a stairwell beneath it, so I didn’t face similar challenges there.
The hinged door is functioning well. So far, none of the hinges have pulled out, and I hope they remain secure since reinstalling them at this angle would be nearly impossible. They seem very tightly attached, so I don't anticipate any issues. To ensure success with this doorway, avoid applying glue to the underside of the staircase where it meets the floor. Instead, glue only where it meets the wall and ceiling. This allows some flexibility for your door to open and close properly. Gluing the bottom to the floor can make the staircase too rigid, leading to problems with door movement as wood expands and contracts.
Regarding tab-and-slot die-cut dollhouses, finishing them can be quite challenging. Creative thinking is essential to achieve a polished look after assembly. These dollhouses do not lend themselves to easy success; assembling them is tricky, and finishing poses even greater challenges. You’ll need to improvise and make decisions in advance to address unavoidable issues.
As a reminder, this dollhouse does not come with any interior trim except for the windows and front door. All other doors lack trim, so you will need to create it yourself using basswood strips that match the kit’s wood thickness of 1/8 inch. I made trim for two doors on the second floor; without it, you won’t achieve a finished appearance.
This dollhouse includes a railing with handrails for the third-floor stairwell but lacks handrails for both the first and second floors. I might be mistaken since there are still many pieces left to install, but based on what I see, there appear to be no handrails available. You can make them from basswood strips like those used for doorways; however, I haven't tackled that yet. Speaking of stair railings, note that there are railings on the walls opposite the staircases as part of the wall partitions. The dollhouse only has railings on one side of each staircase, so you'll need to think creatively about how to integrate these railings into your design. I used a piece of basswood trim glued at an angle just below the railings to distinguish where they end and where the wall begins. I painted underneath with wall paint and used brown paint above it. While I still need a second coat, you can see my approach in the pictures. Make sure your trims align with those on the opposite side.
Do not install any windows in your dollhouse until you have completely finished with both staircases and bay windows in rooms on the right side of the dollhouse. Certain walls and areas at the front of the staircases can only be accessed through window openings. Ensure everything is complete before installing your acetate windows to avoid closing off access prematurely.


