It's time to install the roof of the dollhouse. Although it may seem complex with many parts, there are actually not that many components. The pieces are interconnected, making them appear more numerous than they are.
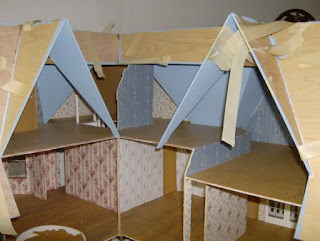
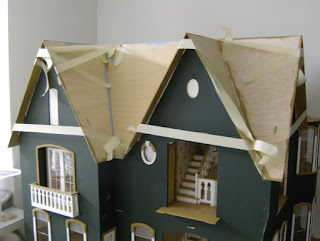
Start by dry assembling the entire roof. Use masking tape to hold the pieces together. Go through the entire assembly process until you understand how everything fits and where finishing touches will be needed. This step is crucial for ensuring that your wallpaper patterns align correctly since the roof will need to be wallpapered or painted before installation. The dry assembly will also help you determine which panels should be installed first for everything to fit properly. The instructions can be confusing, so hands-on experience is beneficial.
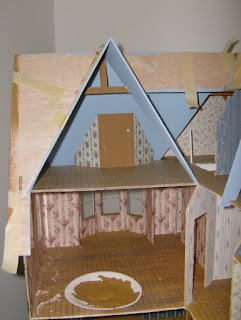
The attic has three areas that can be configured as one large room or divided into two. With ample space available, it's a good idea to maximize it. Once the attic is dry-fitted, use a pencil to mark which wallpaper each panel will need and on which side.
A note on wallpapering - The attic is quite large, and even when divided into three rooms, you'll need double the wallpaper compared to standard three-sided rooms. I recommend using six sheets per room, especially for the area above the guest bedroom with two closets.
I decided to wallpaper the gables and paint the roof panels since I didn't have enough wallpaper for every area. I marked each panel with its designated color based on its room and then primed and wallpapered the gables with my chosen pattern.
Next, create templates for shingling. The dollhouse is too large to crease paper on each roof panel after assembly; you can always dry fit them later before shingling to check the fit and trim as needed. I painted each panel according to my markings, ensuring that I painted the eaves now, as it would be more difficult later. After painting, I let all the panels dry.
Regarding my faux attic door leading to the gazebo, it needs modification due to a low roofline. I removed the trim from the top and will leave it as is for now; I'll fix it later after installing the roof.
Once everything is dry and I've trimmed excess wallpaper from the gable edges, I began installing the panels. It's important to follow the instructions carefully to avoid complications. Certain panels must be installed first for proper fitting. I was familiar with this process, so I didn't need to refer back to the instructions while assembling mine. You can refer to my pictures for guidance on the order of installation.
After placing the middle roofs, you can install the gable roofs in any order you prefer. My roof panels went on smoothly without any issues; all tabs fit into their slots perfectly. This alignment indicates that your dollhouse is straight from top to bottom. Be sure to clamp everything securely, ensuring that all joints are tight and straight while checking for any drips. I'm leaving my roof clamped overnight, and I'll continue working on it tomorrow.


