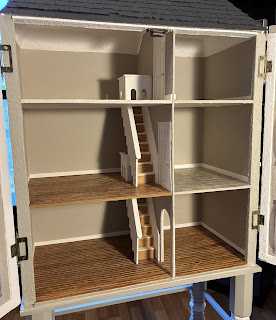
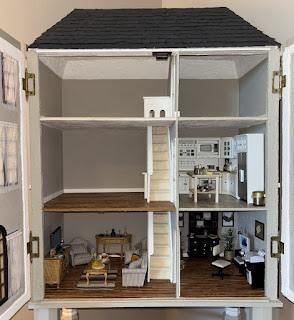
After assembling this dollhouse years ago, it has remained untouched and vacant. The rising cost and scarcity of miniatures dampened my enthusiasm, and my original vision of recreating my townhouse never materialized. Recently, I've become curious about reinvigorating my interest in this long-forgotten project and exploring new possibilities for the dollhouse.
I made a subtle modification to the dollhouse's front panel mechanism by applying a thin, clear acetate layer over the magnet. This adjustment reduced the magnet's original strong grip, which had previously made opening the panels challenging. The modification now allows for smoother access to the interior.
Additionally, I coordinated the window trim by painting the interior in the same dark color used on the exterior. I also began repainting the interior walls with a more neutral, darker shade, as the original white felt too stark and monotonous. The texture on the walls and ceilings was particularly satisfying, making the repainting effort worthwhile compared to simply covering or removing the existing surface.
I enhanced the dollhouse's aesthetic by adding window treatments. Since the dollhouse had numerous windows that appeared bare and unfinished, I selected thin, sheer fabric to create simple, modern curtains. These window treatments significantly improved the overall appearance, giving the dollhouse a more polished and refined look.
After receiving tile for my dollhouse that looked different from the online image, I chose to improve its appearance rather than remove it. Since the tile was firmly glued down and I lacked a suitable replacement, I applied white lightweight spackling compound as grout. This simple technique transformed the tile's look, smoothing out its surface and making the color more acceptable.
 |
| Before |
 |
| After |
After completing the interior painting of the dollhouse, I'm delighted with the new color. The white trim and doors now stand out beautifully against the fresh paint. Although reaching all the small, intricate spaces was challenging, using a handheld mirror helped me navigate and paint those hard-to-reach areas effectively.
Next, the staircase. If I could give one piece of advice to anyone assembling this dollhouse, or the similar Gloucester Dollhouse, it would be to skip the staircase entirely. It doesn’t add anything special and takes up valuable space. The design is plain and awkward, with the risers and treads being the same size, which is not typical of tab-and-slot dollhouses. However, since this staircase was already part of my dollhouse, removing it would have caused significant damage to the surrounding walls and floors. Instead, I decided to keep it but modify it so it wouldn’t draw too much attention. The wooden risers highlighted the staircase's flaws, so I covered it entirely with carpet instead. I used felt in the lightest color I could find to match the bedroom carpet, and it worked well. The carpet softens the staircase's appearance, making it less of a focal point in the dollhouse interior.
I've fallen in love with this dollhouse again after making these simple changes. It's now beginning to resemble the modern design I envisioned. As my only modern dollhouse, I plan to gradually decorate it with furniture and accessories, many of which I'll need to create myself since miniatures are increasingly difficult to find. Once complete, I'll be sharing photos of the interior in a gallery link I will post here.


