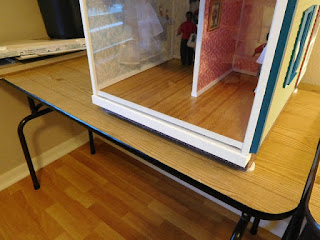
Custom Rehab Week 14

Because of the angled roof eaves that protrude from the back of the dollhouse, creating a railing system for the back cover to slide on, is impossible. An entirely different back cover system will have to be used. It took a little brainstorming to come up with a plan but it worked in the end.

The good thing is that this dollhouse is made of straight angles and even floors all along the back. This means that only one back cover panel will be needed and it can lay flat against the dollhouse, covering its interior completely.

The premise for this back cover is that the bottom edge will rest along a rail, that I will add to the first floor, and the top will be held with a magnet, placed at the apex of the back roof, under the eaves. That way the acrylic panel can be easily removed by pulling off the magnet and then lifting up the panel.

First, I have to prepare for the clear, acrylic panel that will be the back cover. Because the acrylic panel has to cover the entire back of the dollhouse and there is an apex, I need to make a template. Do not try to use measurements for this because dollhouses are never square. I used pieces of copy paper, to lay along the back of the dollhouse and tape together, in order to make the template. I then transferred that template to poster board. If the poster board is not large enough, you can join the missing length with tape. This occurred for the roof apex of this dollhouse.

Dry fit your poster board template to make sure it fits correctly onto the back of the dollhouse. The apex is the trickiest part. It must have a nice snug fit.

I set my template to the side for the time being and began installing the marnet that will hold the top of the acrylic panel in place. You must use super strong, neodymium magnets because they must be able to hold an acrylic sheet sandwiched between them. Most craft stores will carry these magnets. I glued one of the the magnets to the apex of the roof. I used crazy glue for this because you have to make sure that the magnet is held in place very well, since it will be under pressure when holding up the acrylic panel and pulling off the outside magnet.

I then created a rail for the bottom of the dollhouse. This rail will act as a "shelf" for holding the bottom of the acrylic panel in place. I made it using stripwood and a square dowel. Make sure you use the stronger basswood strips for this. I painted it white. Tape your template in place before you glue the rail on, in order to make sure that you glue the rail at the right height.

I then went out looking for an acrylic panel that would work for this particular dollhouse. Because this dollhouse is a little different in the back, you will not be able to acquire the panel at the hardware store. They will not cut panels in any angle, even if it's straight cuts. So, I recommend you do not buy the panel from them.

The best panel for this particular dollhouse is an acetate poster frame panel. Poster frame panel is a little thinner than the panels you get at the hardware store but still thick enough to hold well. Make sure you get a poster frame that does not have a thin, paperlike, clear cover. It must be the thicker acetate. Unfortunately, the poster frame will not be labeled in any particular way for you to know this but if you tap on the "glass" front, you will be able to tell if it's hard acetate or thin clear paper. It should feel solid and sturdy when you tap it. For this size dollhouse, the frame was relatively inexpensive.

The acetate poster panel has to be cut with a craft knife. It is too thick for scissors but it is still thin enough to cut through more easily than the acrylic panel at the hardware store. I positioned my template over the acetate and cut with a craft knife. The cuts came out pretty straight but I still used strip wood to frame the sides and hide the edges. This frame also gives the entire panel more stability. Clamp the strip wood frame with binder clamps until dry. Tacky glue should work just fine for this. The roof apex edges do not need framing because they will lay under the roof eaves. Framing them would also interfere with the magnet.

I then created a pull, so that the magnets can be separated and the panel can be removed when needed. I used a simple wooden peg and glued a magnet to the end. I then painted it white.

Once everything was dry, I tested the panel by placing it onto the dollhouse. You can see how the bottom edge of the panel rests on the rail. The side edges are nice and finished since they are covered with the framing. The magnet pull is holding the top apex of the panel in place, so the panel does not fall forward. When the panel needs to be removed, the pull is simply lifted off and the panel is lifted from the bottom railing.

The acetate poster panel is very lightweight, so its easy to manage when removed. The only thing to keep in mind is that it can scratch easily, so avoid any damage to it by handling it minimally. Clean it using a microfiber cloth only. Though acetate should not be the first choice for a back cover, it can be extremely effective when trying to apply a back cover to dollhouses with certain architectural features that make a railing system impossible to apply. It is also very inexpensive and easy enough to cut that even intricate patterns can be cut out of it.