Custom Rehab Week 3

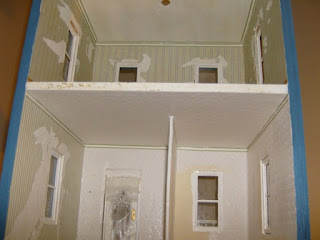
My partition is nice and dry, so now it's time to think about interior finishes for the first floor.

The first thing I want to do is cover the terrible ceilings. They were painted with the wrong paint. The paint is very glossy and went on unevenly. I suppose the gloss had a lot to do with that. There are several areas where brush strokes are visible. There is no point in trying to apply a coat of paint over all of this gloss. It will take forever and might not dry correctly. A better way to solve this is to just cover the ceilings with textured paper.

In order to keep costs down, I was able to find textured scrapbook paper but it has drawbacks. The sheets are not large enough to cover an entire ceiling, so they have to be joined in several areas. This is why scrapbook paper should never be your first choice for finishing one inch scale dollhouses, especially for the ceilings. In this case though, it was inexpensive and anything is an upgrade to the terribly painted ceilings.

First, I turned the dollhouse sideways in order to have better access to the ceiling area. It would have been preferable to sit it upside down but the shape of the roof makes that impossible, so sitting it sideways is the next best thing.

I then made a paper template of the ceiling, using regular copy paper. It creases easily, it's lightweight and is a manageable size for use in dollhouses. I joined papers together and taped them with masking tape in order to get the shape and size of the ceilings.

After the template was made, I transferred it to poster board. Poster board is great for adhering finishes to. It has the same thickness as card stock and comes in large enough sheets to make templates of any area of a dollhouse. The poster board has a matte side and a shiny side. You want to adhere your finishes to the matte side. The shiny side will be glued to the dollhouse wall.

After I had the poster board template, I dry fitted it into the dollhouse in order to tweak the fit.

Once it fit perfectly, I was able to plan out how I would apply the textured scrapbook paper to it. I made sure the joined seams were in inconspicuous areas. Unfortunately the pattern doesn't line up at the joints, just because of how the scrapbook paper is made, but I was able to get the pattern to continue as close as possible. Because it is on the ceilings, the imperfections are nearly invisible, unless you're looking for them.

I adhered the scrapbook paper to the poster board, using Mod Podge, Paper, Matte. You apply it like you would wallpaper paste, with a brush. I personally do not like using this product but for this particular project, it works. It's thin, so it will not over soak your paper. This is good because the last thing you want, when you adhere paper to paper, is for the glue to be too wet. That will cause wrinkling, buckling and warping of the template. This product does not cause any of those to happen. It also goes on evenly, which prevents wrinkling and wet areas.

The downside is that this product dries in a blink of an eye. You have to move quickly, so make sure that you go through dry test runs on how you will apply your paper. Do all of your planning and cutting before you begin adhering.

Do not apply your scrapbook paper to your template using wallpaper paste. It is way too thick and your templates will not dry properly. You can use thinned out tacky glue instead but you might have some wrinkling. Mod Podge is inexpensive and easily found at craft stores everywhere.

Once the template was complete, I dry fitted it to the ceilings and again tweaked the fit with scissors. I then used tacky glue to adhere the completed template to the ceiling.

If your dollhouse has wiring running along the ceilings, do not glue the template permanently to them. You can use double sided carpet tape instead or repositionable glue. The moldings, which will be applied later, will also help with the hold. These poster board templates are sturdy but lightweight enough to lay flat and in place, in your dollhouse, with minimal support.

The joined seams are nearly invisible once on the ceilings. It's a small price to pay for very inexpensive ceiling covers.