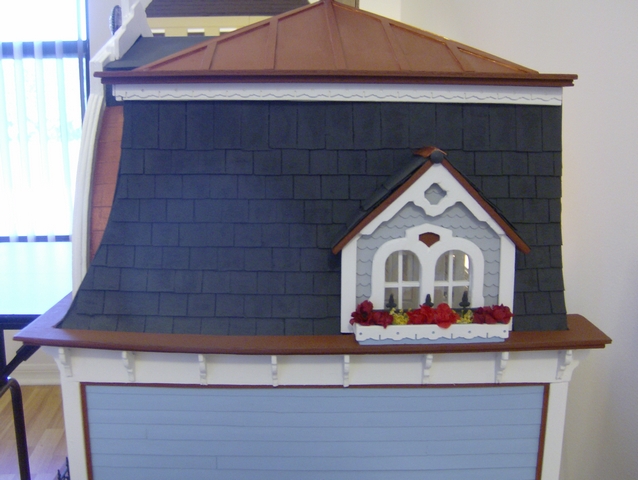
Now that I have more trim, I was able to continue working on the copper top roof design. I also finished the dormers by adding flowers and decorative trim to the flower boxes. I like to fill my flower boxes with a bit of cotton, which serves as a base for the flowers. I then glue the flowers to the cotton. If I want to change the flowers later, I can easily pull them out with the cotton. This method keeps the flowers secure without gluing them directly to the dollhouse. You can find inexpensive small flowers in the floral section of your local craft store, so you don’t have to spend a lot on miniature flowers. To enhance the dormer roofs, I added a strip of quarter-scale shingles painted copper along the top edge.
Shingling
I started shingling the dollhouse, which is hard work, so I completed one panel every few days. I use hot melt glue to attach my shingles because it’s effective and there’s no need to struggle with other types of glue. Since shingles aren’t load-bearing, this works perfectly.
I painted my shingles charcoal. When using dark paint or stain, raw wood can sometimes show between the shingles. Even with a dark base like black poster board, you might still see raw wood where the top shingles overlap the bottom ones. To avoid this issue, it’s best to paint or stain your shingles before installation. I can't imagine painting each shingle individually, so I use a thin brush to touch up any visible raw wood between shingles. It’s time-consuming, but it saves me from dealing with a multitude of painted shingles that require drying time and weights to prevent warping.
Another challenge with shingling is aligning the lines at the corners. No matter how precise you are with measurements, minor inconsistencies in roof and wall heights can cause misalignment at the corners, especially with mansard roofs that curve differently. Components like bays and windows can also disrupt your siding pattern at corners. While walls have corner trim that helps hide these issues, some mansard roofs, like the Willowcrest model, do not. Although you can create your own corner trim, I prefer to keep the dollhouse as close to its original design as possible.
Do your best to align the shingle lines at the corners, but don’t worry if they’re slightly off. Forcing them together might result in narrower rows of shingles or siding at the top of each panel. There will always be some inconsistency in the pattern, but once everything is together, it won’t be noticeable.
Exterior Chimney
With the interior chimney parts installed, it’s time to add the exterior pieces. These are easy to install through the assembled roof; just slide them into place, glue them, and clamp until dry. Be careful not to make them too long, as they could damage the mural underneath. You can fill any gaps between the chimney and roof opening with spackle or frame around it with trim; I only needed spackle.
I decided to finish my exterior chimney differently than instructed in the kit. Using the same chimney pieces from the kit, I created my own design for the chimney top with divided trim rather than having all of it laminated at once. To add texture to the chimney top, I mixed spackle and paint and applied it with a brush. I covered the bottom of the chimney with brick-printed paper that matches the dollhouse foundation. The flues are made from square dowels that I painted black and positioned on top of the chimney. I used cotton to simulate smoke coming from the chimney.