Upholstery was straightforward. This was the only time I used hot melt glue, applying fabric scraps I bought at the fabric store. If you choose patterns, opt for small designs to maintain scale. I glued the fabric to the back of the provided cardboard and used silicone finger protector caps to flatten it into the glue, avoiding hard globs. It's best not to use your bare fingers since the glue is hot. Hot melt glue allows the fabric to stick quickly, preventing it from shifting while positioning.
Instead of cotton balls as suggested, I used craft felt for padding since I had some available. Cotton balls can work too. I cut the felt to fit the cardboard, using four layers for fluffiness and six for the mattress. I made a bedspread with the same fabric and added one felt sheet inside for extra fluff. I also ordered mini lace to add around the pillows and bedspread.
The living room hutch is closed, making it impossible to place items inside once the trim is glued on. However, if you don’t permanently glue the trim with the acetate panel, you can add ornaments later. I plan to glue the acetate to the trim but will use non-permanent museum wax for the trim itself. This way, I can remove it to place items inside and then press it back in place afterward. I need to finish staining everything first. The kitchen stove doesn’t come with a plastic piece for a glass oven door, so I made one by cutting a square from a plastic table cover and gluing it behind the oven door.
I placed all assembled pieces that need staining inside a box. I’ll take it outside to stain and then let it dry in a well-ventilated area. Faux stain can be used to avoid fumes. After letting the glue dry overnight, I stained all of the furniture, which is now dry.
I completed the bed upholstery by adding lace. I added mirrors and clock faces, included in the kit, assembling furniture that couldn’t be put together before staining. The mirrors look very realistic. Don’t remove the plastic film until you’re ready to glue them in place, as they can scratch easily. Once glued, ensure nothing rubs against them to prevent damage. I also placed paintings in their frames.
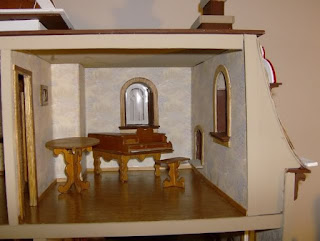
You can see how the furniture looks inside a Beacon Hill Dollhouse. As you can see, it is enough furniture to fill the entire dollhouse.
These furniture kits can also be painted. Be sure to sand edges well and use lightweight spackling compound to fill rough areas and gaps for a smoother finish. Adding decals, fabric, and trims will help personalize your furniture. These furniture kit sets also come in half scale.


