This dollhouse, made from select plywood, assembles like a typical plywood dollhouse. However, the select plywood is softer, so be careful when punching out the pieces.
At the beginning of the construction, it can be challenging to keep everything stable. As you add more walls, you'll have more points to clamp, making the structure sturdier. It's important to keep adding pieces without pause while building the shell. Each wall supports the others, so to ensure a well-aligned dollhouse, install all the shell walls simultaneously. This allows them to dry together in a square formation. To prevent the tabs of the staircase rail's center wall from falling out of the first-floor slots, wrap them with masking tape from underneath the dollhouse.
Once all the walls are up, stop and clamp everything tightly. Inspect the dollhouse from all angles to ensure all joints are secure. Then apply wood glue to all joints and wait for the entire shell to dry before adding any additional components.
The birch wood used is smooth and splinter-free with a uniform color, but it can be quite soft and fragile compared to regular plywood. Fortunately, sanding is generally unnecessary, as most pieces are already smooth. You can paint the interior walls without issues since there’s no delamination. Even though the wood is of high quality, I still primed my walls because it's essential to treat raw wood properly. I also primed the floors since I plan to print special flooring designs instead of staining them. For this small cottage, printing flooring is acceptable; however, for larger dollhouses, it may not be cost-effective due to ink expenses. Sometimes, store-bought miniature flooring can be a better deal.
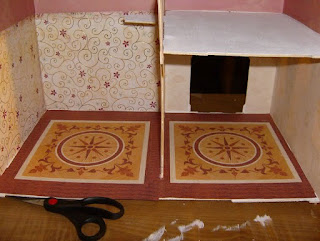
Given the unusual shape of this cottage, careful planning is needed for room distribution and wallpaper patterns. I decided to divide the tall room in half with two different wallpaper designs. I measured and marked where one wallpaper pattern would end and another would begin. Wallpapering should be done before laying down the flooring since it's more delicate. When choosing scrapbook paper for your dollhouse, check if it's reversible. The paper I selected for upstairs had a busy pattern on one side, so I used the textured back instead.
After wallpapering all the walls, I applied the flooring. Remember that printed materials are delicate; moisture can cause ink to bleed or change color. Apply adhesive in a clean area and avoid getting it on the printed side. You may need to patch your pattern since letter-sized paper often doesn't cover an entire wall or floor. I used a glue stick for application because wetter adhesives can warp or tear the paper.


