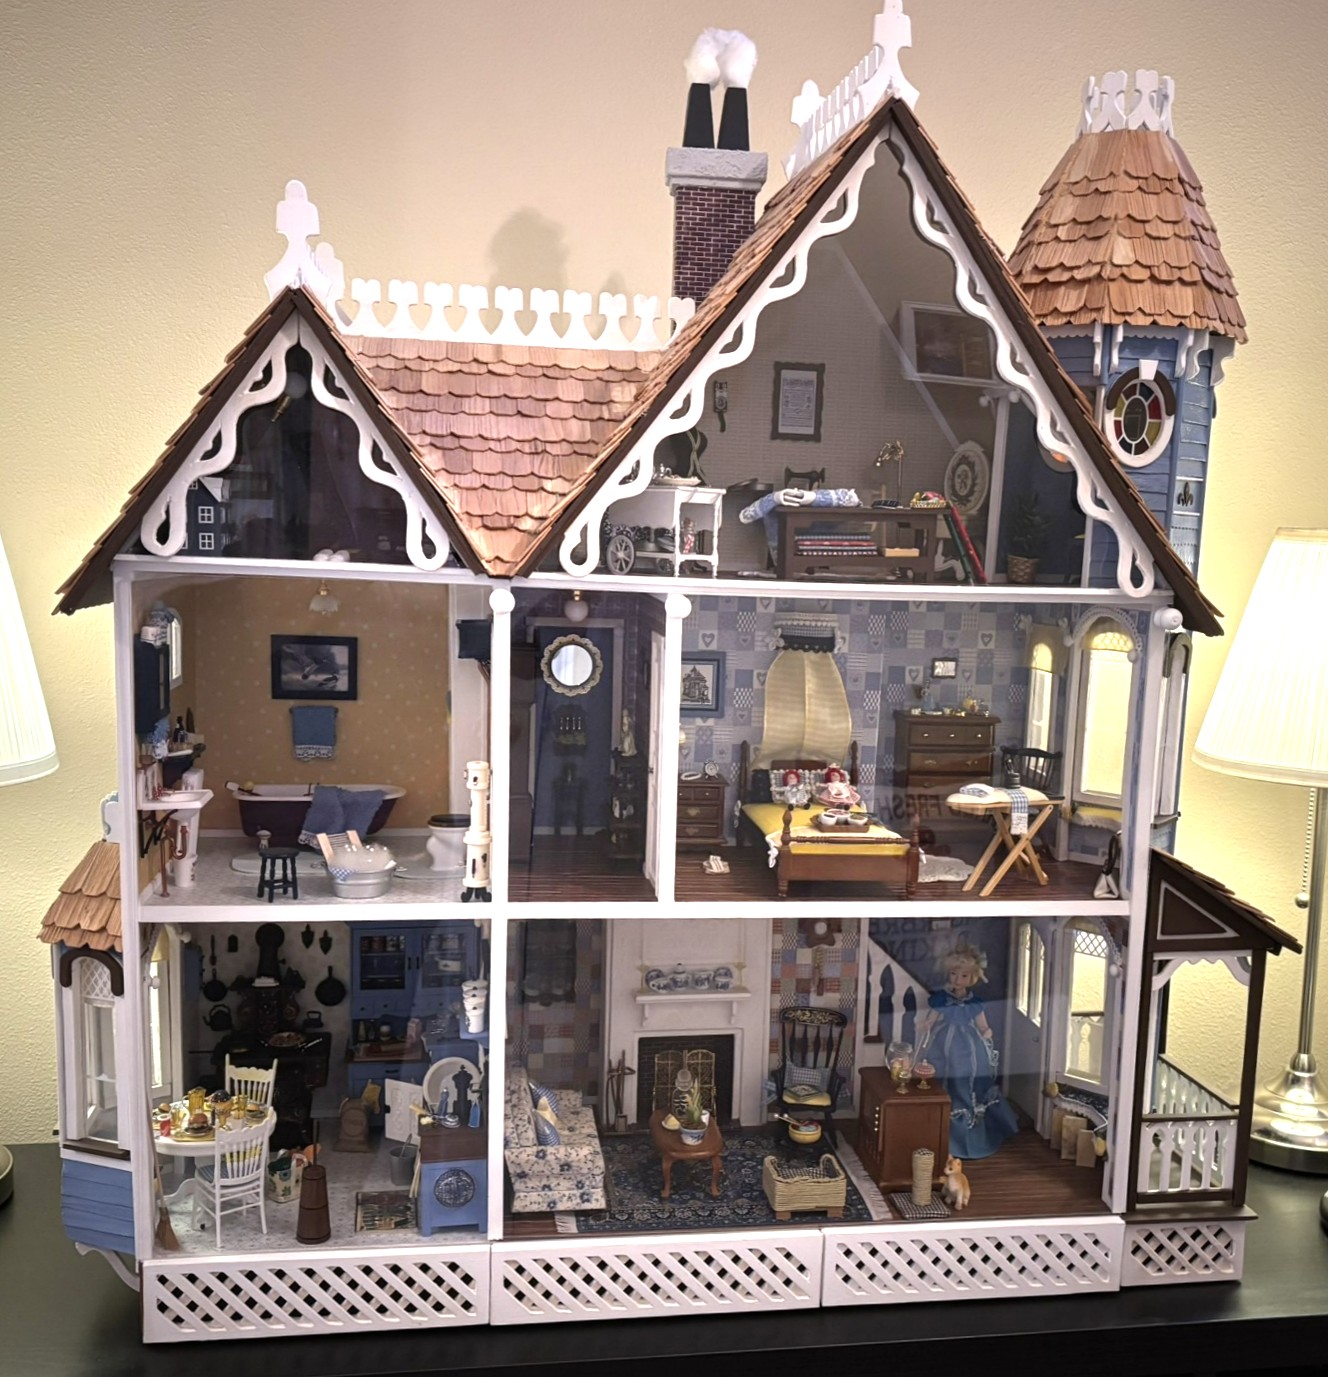
I have completed all the shingling and added the gingerbread trim. Installing the chimney was surprisingly easy, which was a welcome relief given the challenges of assembling the rest of the dollhouse.
To protect the paint and enhance the color, I applied a coat of satin varnish to the exterior walls.
I placed the dollhouse in the foyer on a sideboard instead of mounting it on the wall.
This project took a long time and was quite difficult. The outdated instructions for this model contributed to the challenges. Additionally, the dollhouse was not designed for siding, which made some assembly steps particularly tough. Careful planning is essential for this build, as the instructions do not account for any finishes. Adding details like dowels, trim, and siding can complicate the assembly process. In my case, I had to modify some parts, such as splitting the roof panel in half to fit around the tower due to the extra layers from the siding and dowels. Finishing the drawers was also labor-intensive.
The most significant challenge came from modifying the acrylic panels to fit properly. The extensive customization required for these panels was complex, especially for the third-floor gables. Despite my initial doubts about how it would turn out, everything worked out well. The panels slid into place behind the gingerbread trim and rested securely on a ledge I created along the third floor edge, preventing them from falling backward. They can be easily removed by lifting one corner and sliding them down. The large bottom panel is held in place with magnets and rest on top of the drawers. Each white knob is a magnet, allowing for easy removal of the panel.
I had to cut triangular gable panels from poster acrylic myself since hardware stores do not cut triangles. This process requires patience and a careful workspace to avoid scratches. It took several passes with a craft knife to score the acrylic before snapping it cleanly. The bottom acrylic piece was cut at the hardware store, and a small acrylic piece covering the side tower opening is secured with repositionable glue since it doesn't need frequent removal.
Since this dollhouse has limited interior space, careful planning for miniatures is important. It was designed to hang on a wall, so it lacks depth. Chrysnbon furniture works well because it is more accurately scaled and lightweight for wall hanging, but be cautious about how many pieces you include; my kitchen is already quite full.
This dollhouse is my favorite among all the ones I have assembled over the years. Although it was challenging to put together, it beautifully combines all the best features of larger dollhouses into a more compact design. It includes a built-in fireplace, chimney, porch, tower, bay windows, window seats, a secret room in the tower, an attic cubby, and a staircase. With some careful modifications, you can even create a closet under the staircase. I appreciate how the dollhouse gives the illusion of a hallway and stairwell, adding depth rather than just flat rooms. It feels like a true dollhouse while also serving as a display case for miniatures.
You can visit this dollhouse gallery here.